What is Clampy?
Introducing Clampy, the new DIY gadget that can turn your FlowerPot into a wireless vaporizer by pairing it with our wireless flower diffusers. Our latest CH controllers are equipped with a pre-drilled hole, making it easy for you to screw in your Clampy. However, if your CH controller doesn't have a pre-drilled hole, you can either drill one yourself or send it to us, and we'll take care of it. Clampy can also be screwed into your heat shield stand. Once you've fitted your Clampy, you can create your ideal cordless dry herb vaporizer using a 25mm coil or a 20mm coil, or use it to heat up any banger.
Install Clampy
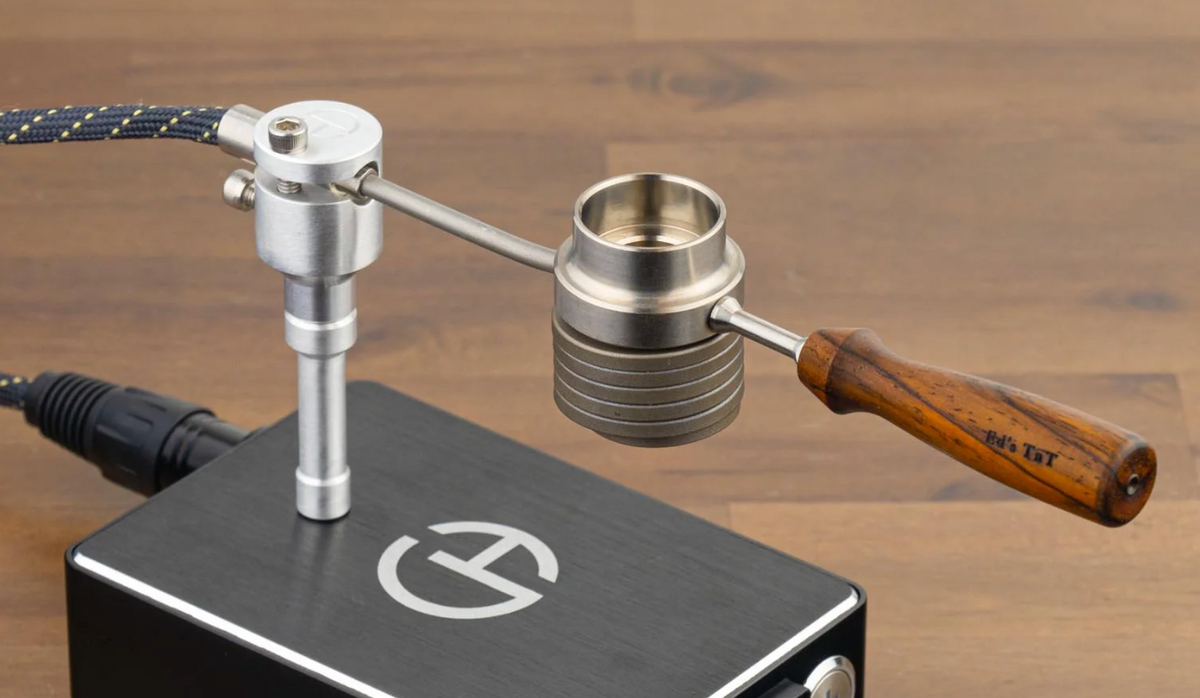
- Predrilled Controllers - To install Clampy on a predrilled CH controller, you should start by screwing the clamp post into the predrilled hole. After that, drop the clamp head onto the clamp post and tighten the screw with an Allen Wrench (9/64). Next, you will need to unscrew the top screw in order to place your enail coil into the clamp head. Once you have placed the enail coil in Clampy, simply tighten it with your Allen wrench. After that, you have created a wireless vaporizer with Clampy.
- CH Heat Stand Post - To install Clampy onto the CH heat stand post (stand only), start by screwing the clamp post into the stand. Then, drop the clamp head onto the clamp post and tighten the screw with an Allen wrench (9/64). After that, unscrew the top screw to place your enail coil into the clamp head. Once you have placed the enail coil in Clampy, simply tighten it with your Allen wrench. Finally, you will be ready to use Clampy.
- All other materials - If you're looking to create your own vape station using Clampy, you can use a threaded insert to make a stand out of wood and retrofit it for your heat post. This brass insert requires a predrilled 3/8" hole and can be installed using a large flat head screwdriver.
How to use Clampy
Clampy can be used just like any other FlowerPot and ZenLeaf vaporizer. To use it for flower, turn on your controller and set it to your desired temperature. Once your vaporizer is heated up, grab your diffuser, flip it over, and place it on your bowl. Then, take your hit. If you are using Clampy with a banger, place your banger in the coil and wait for it to heat up. Then, transfer your banger to your glass rig, place your dab in your banger, and you're ready to go.
Tools Needed for Installation:
Only tool needed for installation on predrilled controllers and heat shield post:
- Allen wrench (9/64)
Tools needed for installation on all other materials:
- Drill Bit (3/8")
- FlowerPot threaded insert
- Wide flat head screwdriver
Wireless vs FlowerPot Vaporizer
Going wireless with our ZenLeaf vaporizer series can help you maintain a cleaner and more organized workspace. Thanks to its smaller, organized, and compact design, there are no loose wires or cords to get in the way, become tangled, or accidentally yanked on. The device allows you to easily switch between using flower and dabs, as well as easily switch between different wireless flower diffusers. Our ZenLeaf vaporizer series is mobile and not tethered to a PID, making it great for use with our ball vape pipes. Compared to a wireless vaporizer, the advantage of using the Flowerpot vaporizer is that it consistently radiates heat, making it a more suitable device for festivals or large parties. With ZenLeaf, you can take 3-4 hits before having to put it back on the coil to reheat.